Vinyl is great! Or better: Vinyl can be great. But only if you calibrated your turntable with utmost care and dedication. This story is to help you get there. Don’t expect a 30 page manual, there are better ways these days now that we have Youtube (and DVDs). I’ll get to that in the end of this blog but I think it’s wise to start with a few hints and guidelines. You may know some or most of it but aren’t overviews like this always fun to read for vinyl addicts like we are…?
First, take your time. Be patient. Don’t drink too much coffee, it may cause your hands to shake a little and that is the last thing you’ll need while handling your cartridge.
Only practice makes perfect, says the proverb. You’ll need a lot of practice to get your turntable top-level. Take your time, you’ll get somewhere the first time, a bit closer next time, etc. I have over 40 years of experience adjusting turntables and even I cannot get a new turntable perfectly performing in one go. So don’t despair. Remember: it’s your hobby.
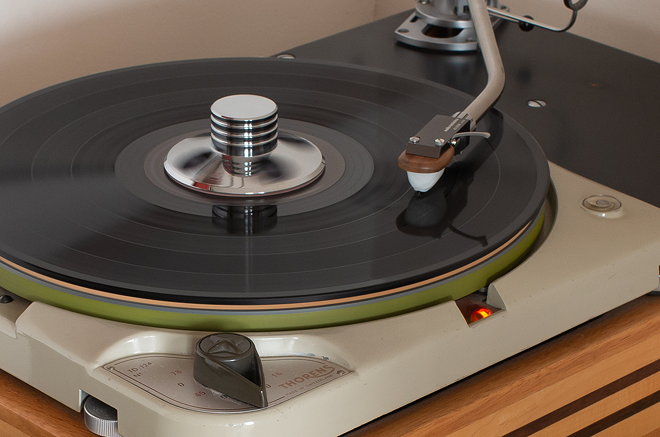
Your turntable should be mounted perfectly horizontally, on a solid but acoustically dead support, preferably mounted to a wall to avoid vibration transmission from the floor.
If your turntable is of the sub-chassis type, its springs need to be adjusted so that the platter & arm couple can move 0.5-1.0 cm freely in all directions. Touch the spindle lightly and check that the platter & arm dances vertically only (i.e. without swaying).
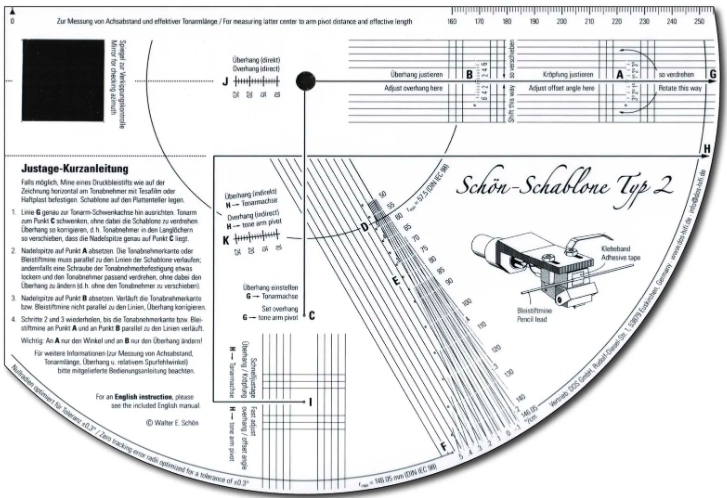
The correct position of the arm is defined by the ‘overhang’. If you move your arm close to the spindle, you’ll notice that your cartridge’s needle will be hanging somewhat beyond the spindle. This distance is called the overhang. If your turntable came with an arm mounted you may assume that the manufacturer has done a good job. If turntable and arm were chosen independently the only way to get it right is a device called a ‘protractor’ (many dealers have one or more models in stock).
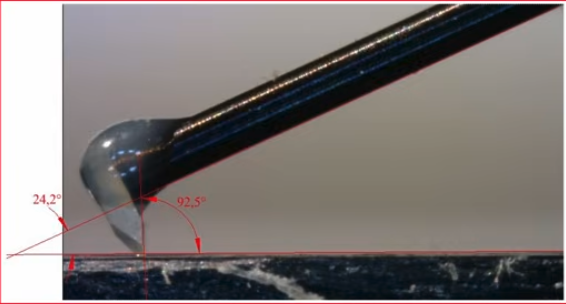
An aspect with quite some impact on sound quality is the Vertical Tracking Angle (VTA). This is the angle between the cantilever and the record, it reflects the angle that was used during the cutting process and should be near 22º. Some adjustment is possible by changing the arm height. Normally the cartridge manufacturer has designed its product so that when the arm is horizontal, the angle is correct. Experimenting with arm height may show possible improvements in sound. A good starting point is lowering the arm by 2-4 mm at its base. Don’t be too cautious: 4 mm will cause only 1º of change in the angle.
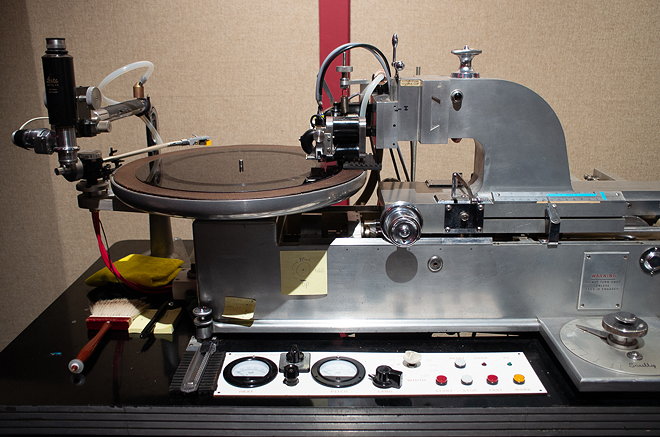
On the cutting lathe in the mastering studio a lacquer is cut with a linear moving arm (see the picture of a vintage Scully lathe below). Most record players have a traditional arm with a fixed pivot. This means that to minimize tracking distortion one has to choose in which two positions on the LP the cartridge body is exactly in parallel to the groove direction. I prefer the Baerwald alignment that has points at 66 and 121 mm from spindle. Again you’ll need a protrator to get it right.
The vertical angle, as seen from the front of the cartridge, is called ‘azimuth’. The top surface of the cartridge should be exactly parallel to the record. This guarantees that the needle touches both groove walls in perfect balance. If in doubt, use a thin flat mirror (with equal thickness as an LP), and place it on the platter under the needle. Deviations in azimuth are then easy to see.
The best known aspect of turntable alignment is the stylus pressure. Most manufacturers specify a range, like 1.8 to 2.2 g. A good starting point is to choose a figure close to indicated maximum, like 2.1 g. Don’t be afraid of groove or stylus wear, I have played with Ortofon SPUs for extended periods of time, they require 3.5 to 4 g and I never damaged even frequently used records. But DO CLEAN record and needle EACH TIME you play a side. Carbon fiber brushes for LP are available everywhere, for needle brushes better avoid the softer ones.
Most people also heard about ‘anti-skating’. The majority of arms sport some kind of scale to set the sideways thrust comparable to the stylus pressure. The numbers there tend to be highish, so if your stylus pressure is set at 2 g, try 1.5 anti-skating. Don’t use the blank (groove free) area that some test LPs have: yes the needle will ‘skate’ there but the forces on a flat surface are totally different from a groove. The best way to adjust anti-skating is to measure the left and right channel distortions and adjust until they are most equal, but that requires a test record and measurement equipment. What I often do is put on strong reading glasses, sit with my eyes at level with needle and LP, run the platter motor, release the arm lift and carefully monitor the needle as it lands in the groove: it should not flex to either side but stay in the exact position/direction it had before it hit the record.
One general but important warning: Never Ever move your platter in the backwards direction while the needle is on the record or on the protractor. If you do so you may hear Tick as the needle breaks or Ping if the cantilever dies first.
Peter van Willenswaard
References
- A good and reliable turntable setup video for beginners is by Craig of Vinyl TV. One remark: he exaggerates the prices for protrators, in reality you can have them from say 12 to max 100 euros/dollars.
- For more information about alignment protractors, read this.
- In this video from Ortofon you’ll find a good graphical explanation of the difference and relationship between VAT en SRA (vertical tracking angle and stylus rake angle), at about 20 minutes into the video.
- Ortofon has a number of turntable alignment videos, each treating a different subject of the art (10 videos).
- A detailed essay on VTA and SRA has been written by Michael Fremer (of Stereophile, Absolute Sound and now Tracking Angle fame).
- The best and most comprehensive manual of the Art of Turntable Adjustments is a 3 hour DVD by Michael Fremer.
- Beis wrote about an interesting tool for azimuth and othogonality measurement, but sadly it is not available as a product.